
Landscape Photography Tips: Lessons from my First Year Shooting (pt 2)
Last week, I wrote about 7 lessons I learned during my first year shooting landscapes. I was too wordy to fit all 14 lessons in one post, so I will continue with the remaining lessons now. If you haven't read part one, you can do so here.
The lessons covered below were learned later in the year. In some cases, weeks or even months after the first 7. This may seem odd because there are several very obvious lessons, such as the importance of time and purpose in photography. That's due to my very stubborn nature. I had heard about these tips quite often, but it wasn't until I experienced the struggles of not putting them into practice did I actually learn my lesson. Hopefully I can help you avoid having to learn the hard way as I did.
8. Camera Remotes Offer Great Value
A camera remote's primary role is to reduce camera shake, which causes blur in your images. It does this by enabling you to take a photo without pressing the shutter release button on your camera. Yes, that subtle click of the button can cause camera shake and impact the quality of your photo, especially if you are working with long shutter speeds.
It's secondary role is to save you from having to keep the shutter release button pressed while in bulb mode. Bulb mode allows you to set your shutter speed to as long as you need it to be. You can find the bulb mode (labeled with the letter B) in your shutter speed settings on the left. Once your shutter speed reaches beyond 25 or 30 seconds, it will switch to B mode. B mode is necessary if you don't want or are not able to adjust your aperture or ISO to properly expose your photo.
For example, let's say you're shooting a night scene and have your aperture at f22 and your ISO at the highest setting possible on your camera. You find that at a shutter speed of 30 seconds (the longest your camera will go before switching to bulb mode), your image is still underexposed. In this scenario, you would need to switch to B mode and have a shutter speed of 31 seconds or more to properly expose your photo.
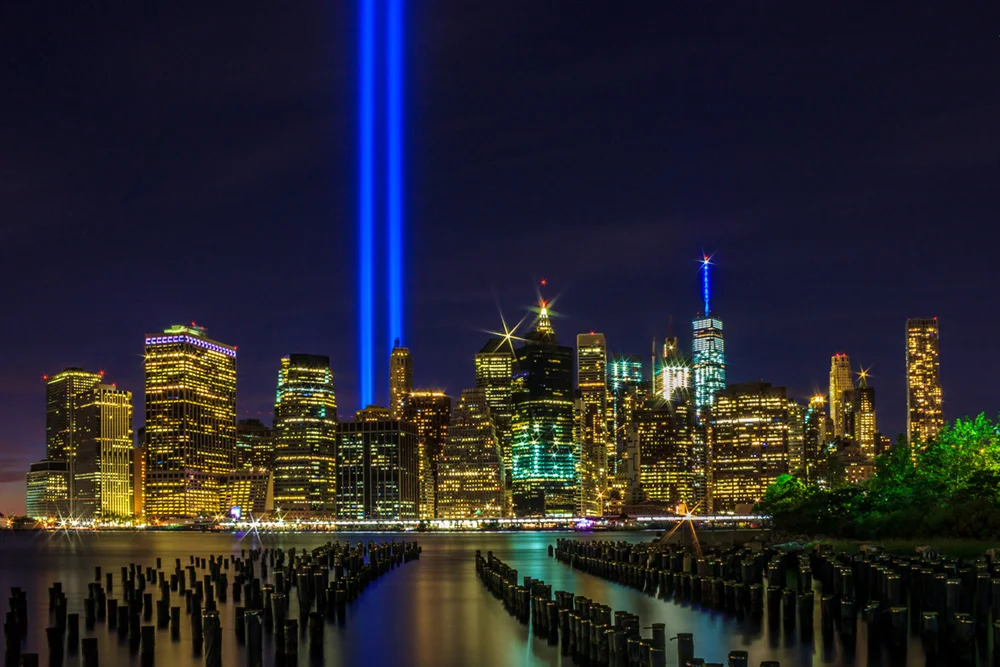
Night photography shot at 180s exposure using a remote in bulb mode (Location: DUMBO, Brooklyn)
Anyway, back to my point. Once you switch to bulb mode, you need to control the length of the shutter speed by holding down the shutter release button. E.g., holding down the button for 60 seconds will give you a shutter speed of 60 seconds. Here, it would be absolutely critical to have a remote because not only would it remove the camera shake from you pressing the button, but the right remote will also allow you to lock down the shutter release, and simply unlock it once you've reached the intended shutter speed.
I bought my remote control from Amazon for $7.99. This piece of equipment alone has given me the most bang for my buck. It's incredibly lightweight, portable, requires no battery and has survived many drops into puddles.
9. Use ND Filters for Mid-Day Shooting
In last week's post, I stressed not shooting during the middle of the day when the light is harsh. Well, life doesn't always work that way. If you're on vacation visiting various landmarks throughout the day, for example, you don't want to miss out on capturing those moments.
So if you must shoot mid-day, neutral density (ND) filters can help save your photos from becoming completely blown out. The purpose of an ND filter is to reduce the amount of light coming into your camera, allowing you to achieve the right exposure without the negative side effects of strong sunlight.
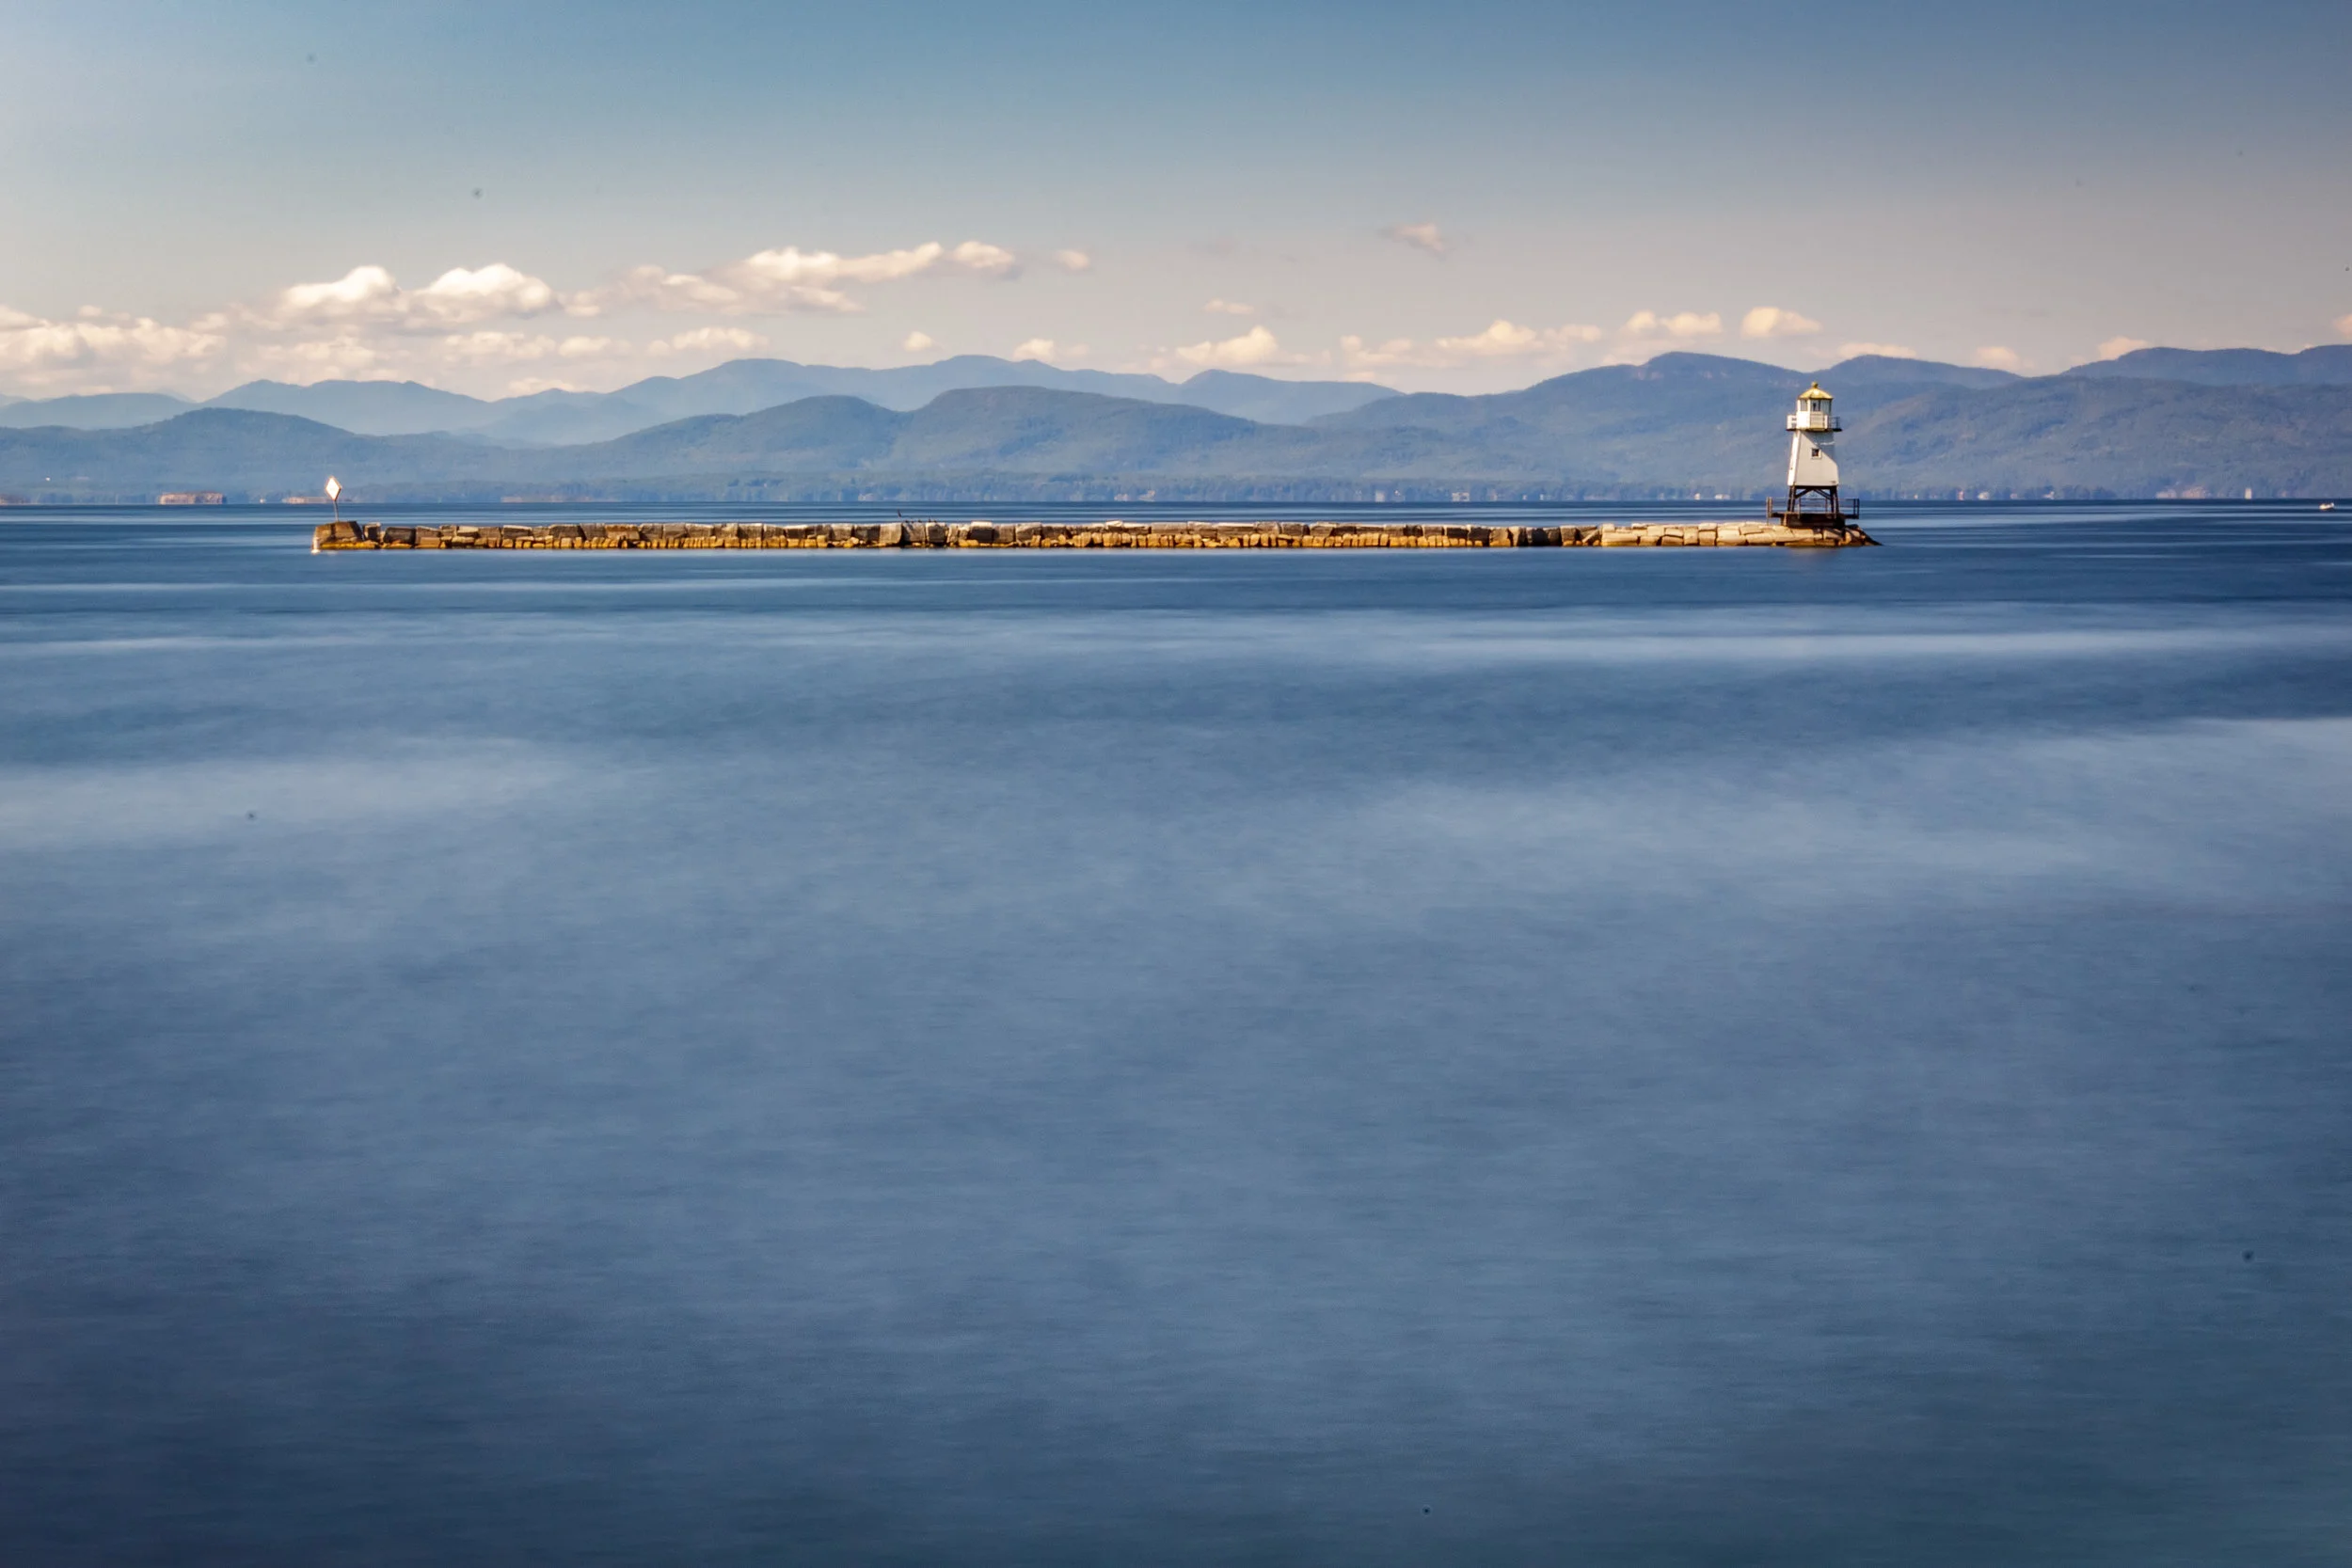
Mid-day shooting using an ND filter (Location: Vermont)
ND filters aren't just for shooting mid-day, they also help with long exposures. Even when shooting during dusk and dawn, I often leverage my ND filters to create silky water, smeared clouds, or other long exposure effects.
10. Weather Protect Your Camera
I used to envision shooting in the rain as this poetic experience in which I sacrifice wet clothes for glossy shots of rain drops and reflections. In reality, my first time shooting in the rain involved me hunched over my camera with an umbrella, which proved to ultimately be worthless as the rain came down sideways. I was wiping my lens every 2 seconds and I left Washington Square Park soaked and sulking.
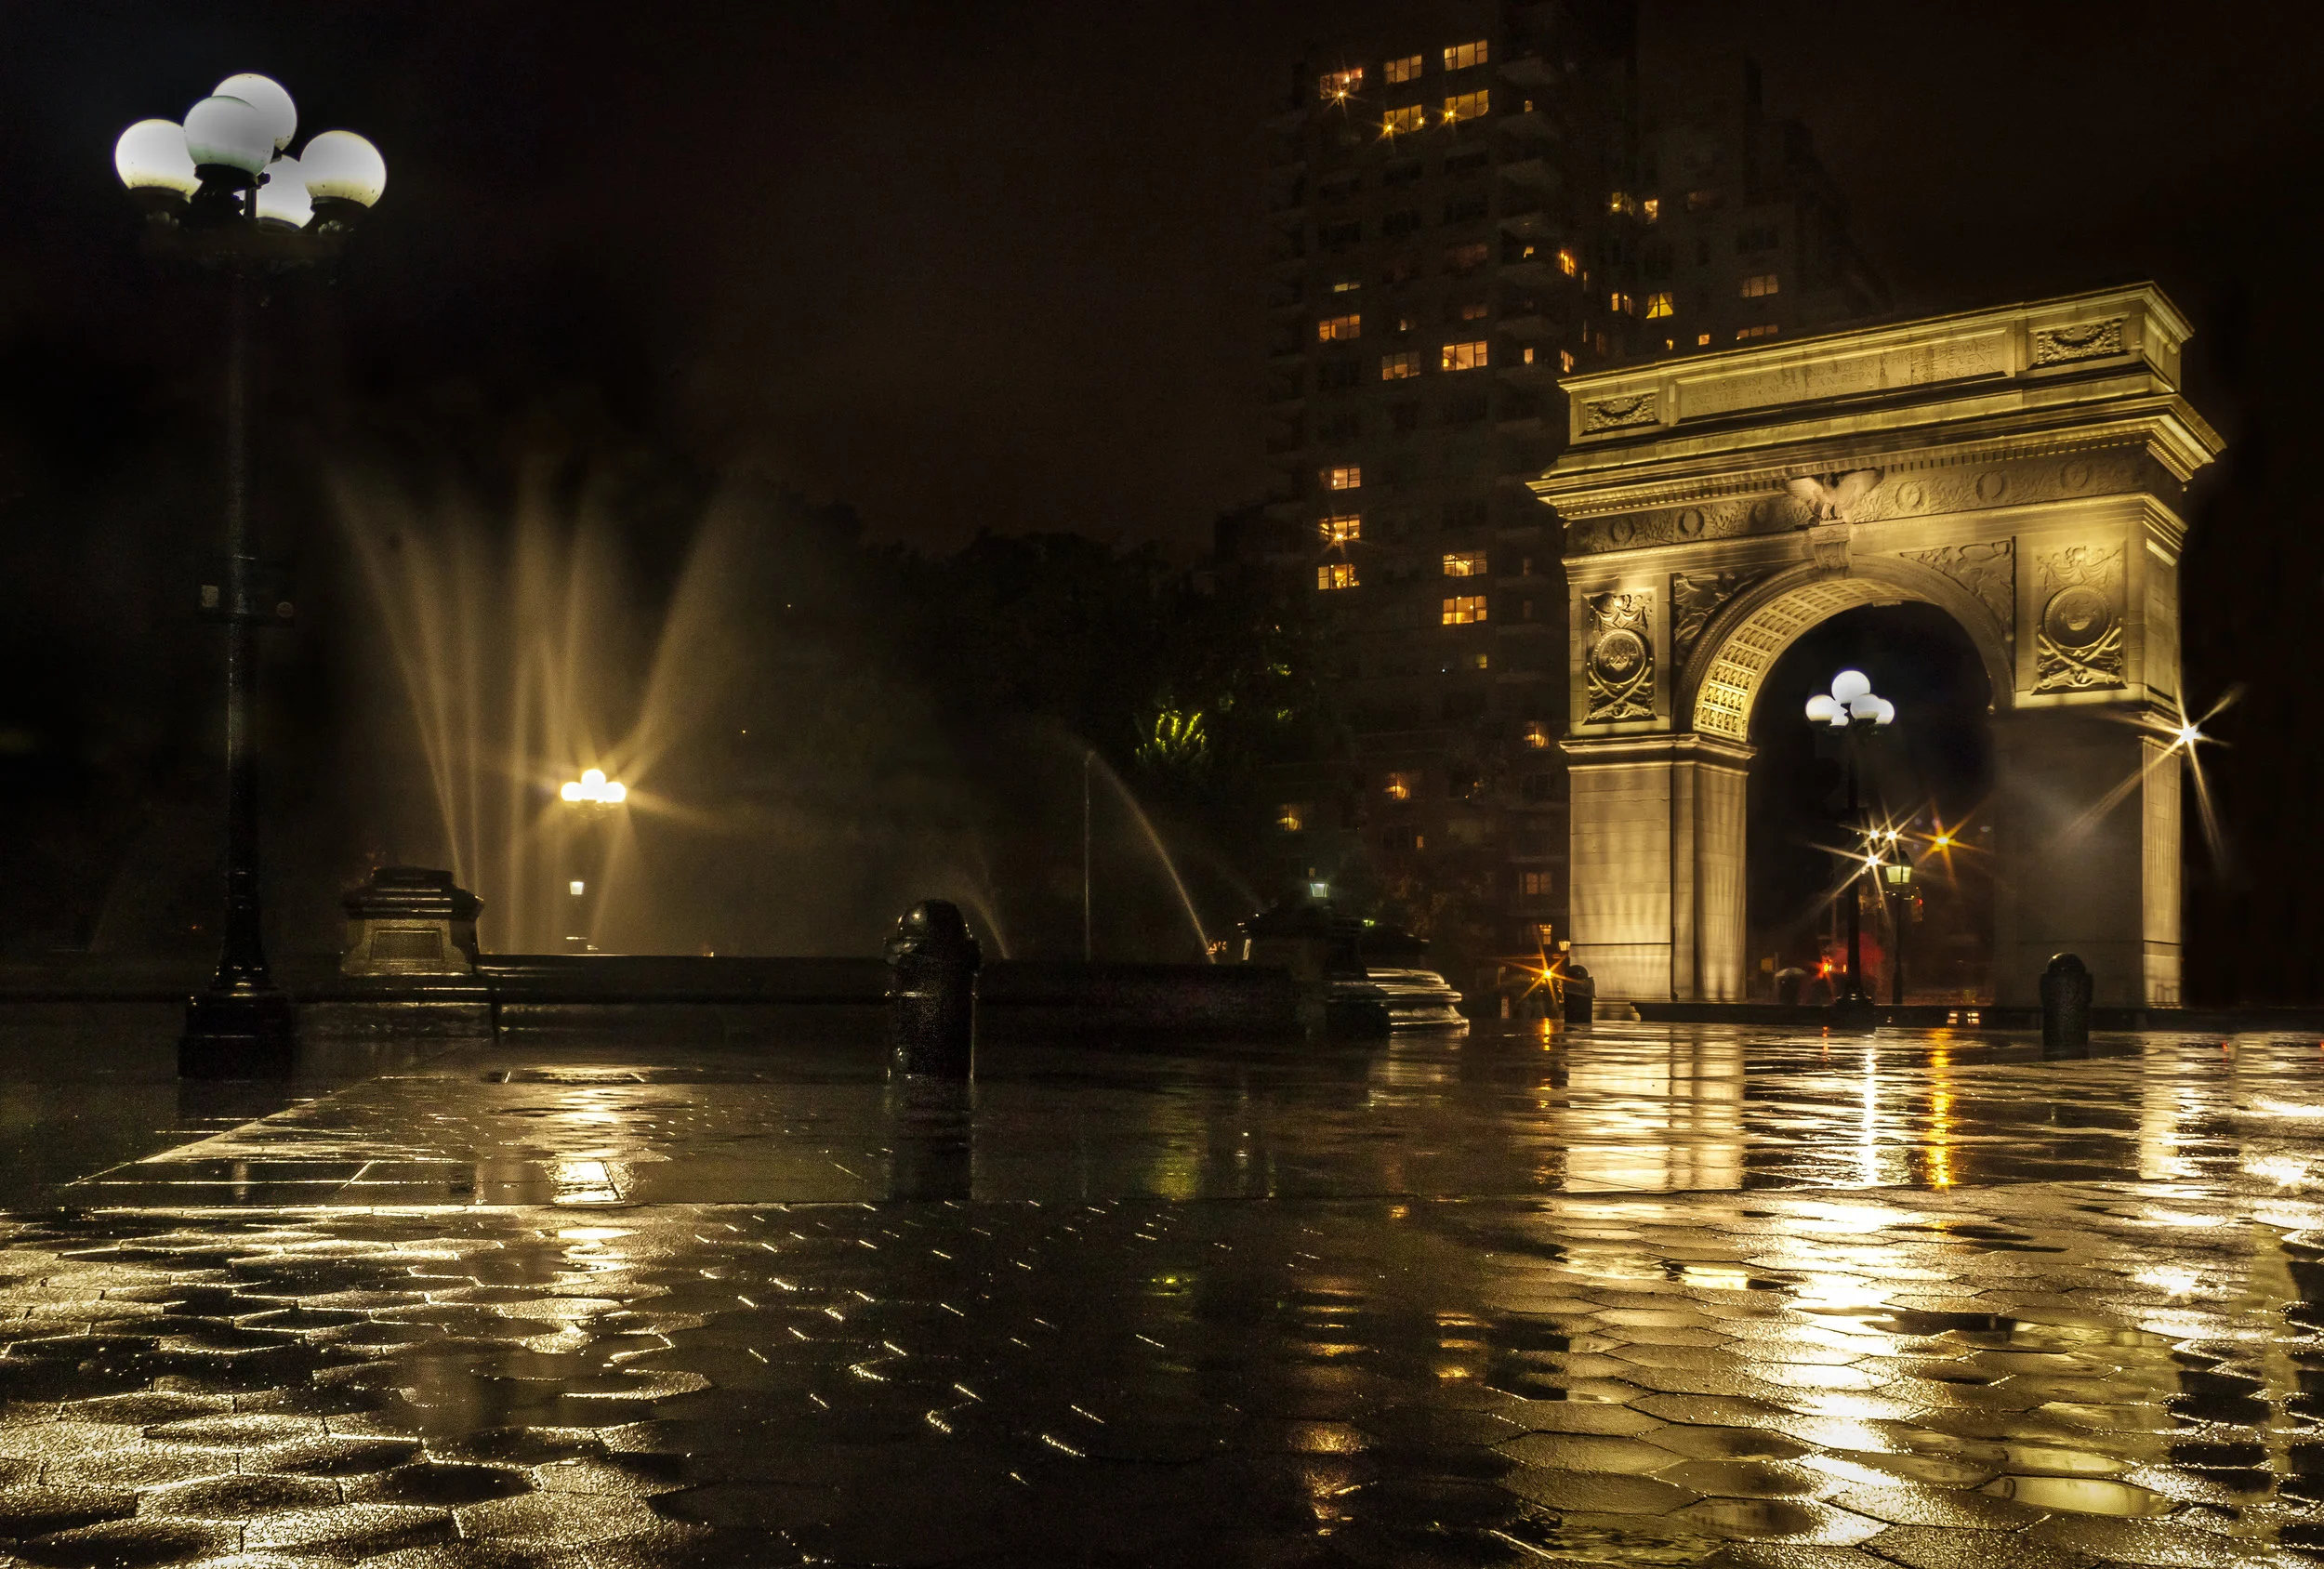
A very unglamorous shoot in the rain (Location: Washington Square Park)
Soon after, I bought a rain cover for my camera. They're inexpensive, light, and practical. Having one has made shooting in the rain a lot easier and enjoyable without having to worry about the wellbeing of my equipment.
11. Leverage Bracketing for HDR Photos
When composing a shot with a sky in it, I would encounter issues where either my sky was overexposed or my foreground was underexposed. That was because, assuming there was any light in the sky, the sky was always brighter than the rest of the photo. As a result, exposing for the sky meant your foreground would be too dark, and exposing for your foreground meant your sky would be too bright.
In the beginning, I would expose for the foreground or mid-ground and darken the sky in Lightroom or Photoshop during post processing. And while I still find this effective from time to time, bracketing allows you to darken the sky more naturally, and bring out the best light in various parts of your photo.
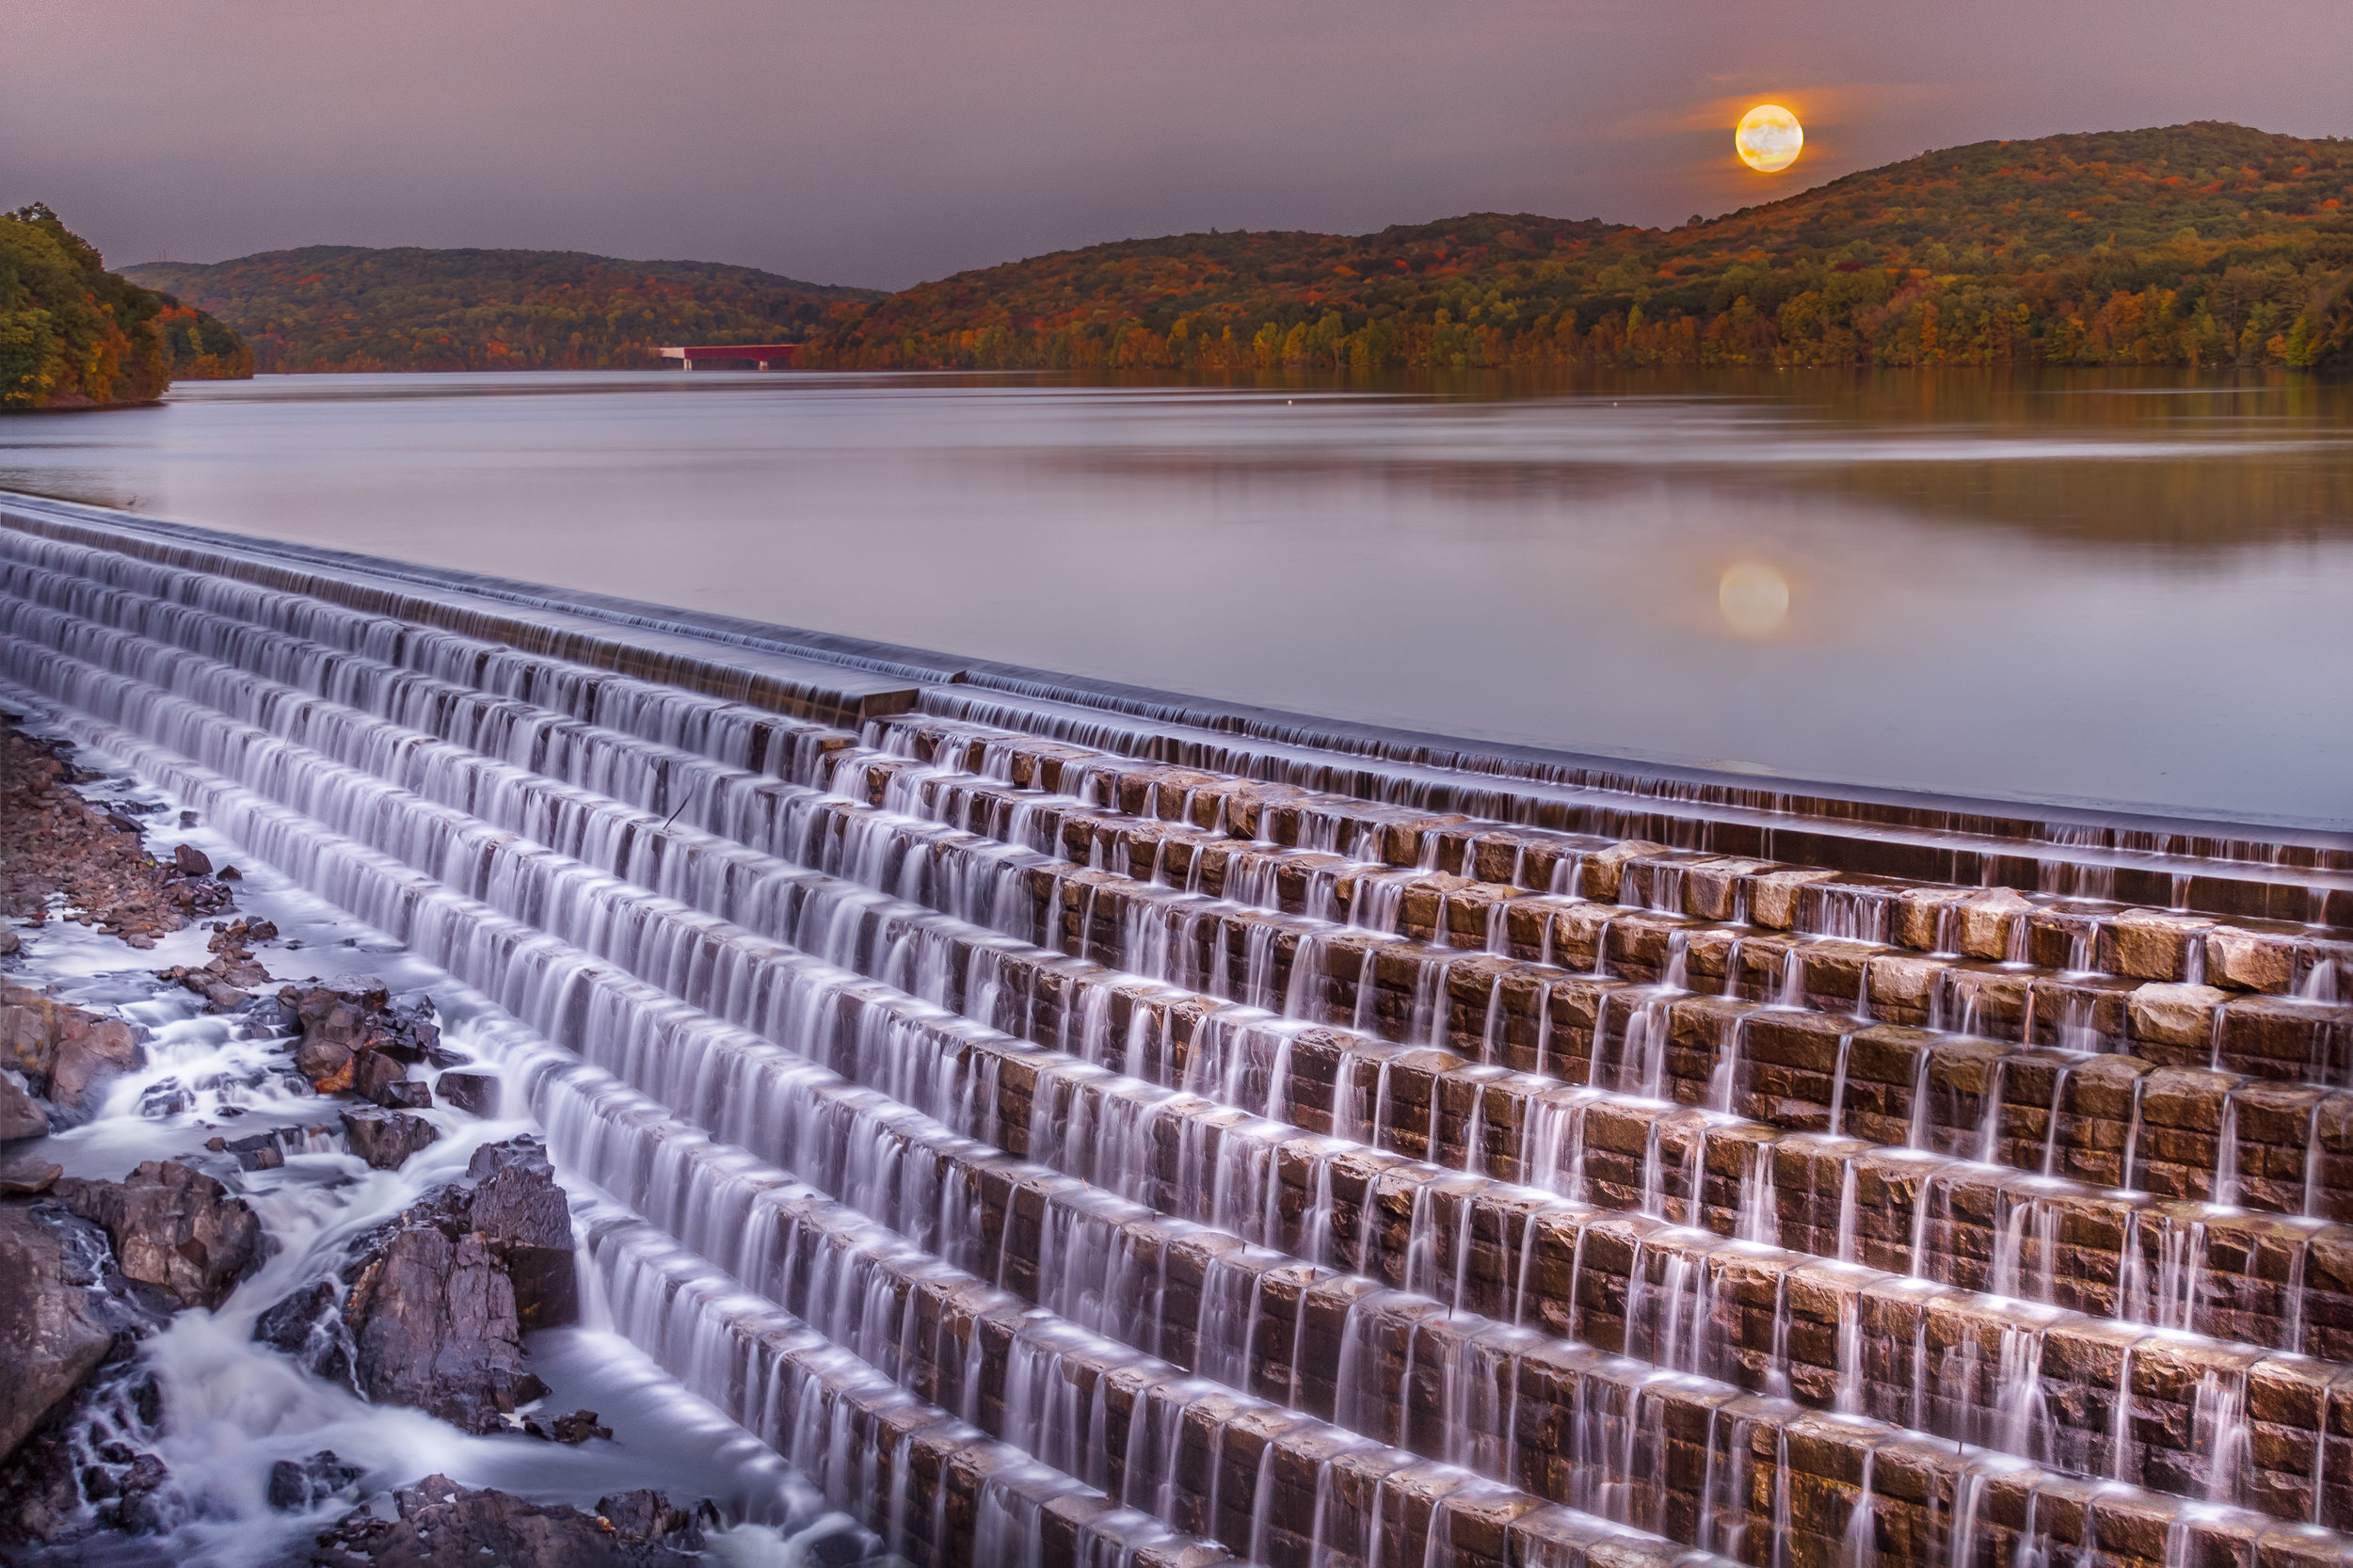
Multiple exposures blended to create this image with the darker sky and the lighter water (Location: Croton Dam)
Bracketing is when you take multiple photos at different exposures and then blend them together. For example, blending the darker skies with lighter foregrounds. This can enable you to bring out the vibrance or drama in your sky, while preserving the light and details in the remainder of your image.
12. Dodge and Burn to Add Depth
I remember scrolling through Instagram and seeing other photographers capture the same shots as me but, for some reason, theirs was a lot better. There was a level of maturity, depth and punch in their photos that mine didn't have. It took me a long time to figure out that experienced photographers use a technique called dodge and burn.
Before dodge and burn
After dodge and burn
Dodge and burn is a simple concept – darkening some areas and lightening others. You can accomplish it to some extent in Lightroom, but it's more effectively done in Photoshop. Previously, I talked about the importance of having control in photography. Dodging and burning gives you control over exactly which areas or details in your photos should be light, and which should be dark. There's no right or wrong way to do this. This is truly where your personal style shines through.
13. Great Shots Take Time
When I took the first stab at using my DSLR, I went outside on a sunny day and shot about 100 photos. As I progressed over the past few months, I've been capturing less images per shoot, but having a higher percentage of images that I'm happy with. That said, I get my best shots when I get to take my time shooting.
I learned this lesson well during my recent trip to Iceland. I made the mistake of booking tours instead of renting a car. This meant, I had 20 - 30 minutes per stop to shoot some of the most beautiful landscapes in the world, under some of the worst weather conditions. 20 - 30 MINUTES. I can take that long to get one shot under perfect weather. The result were photos that were badly composed, poorly exposed and, in some cases, completely unusable – all because I didn't have enough time.
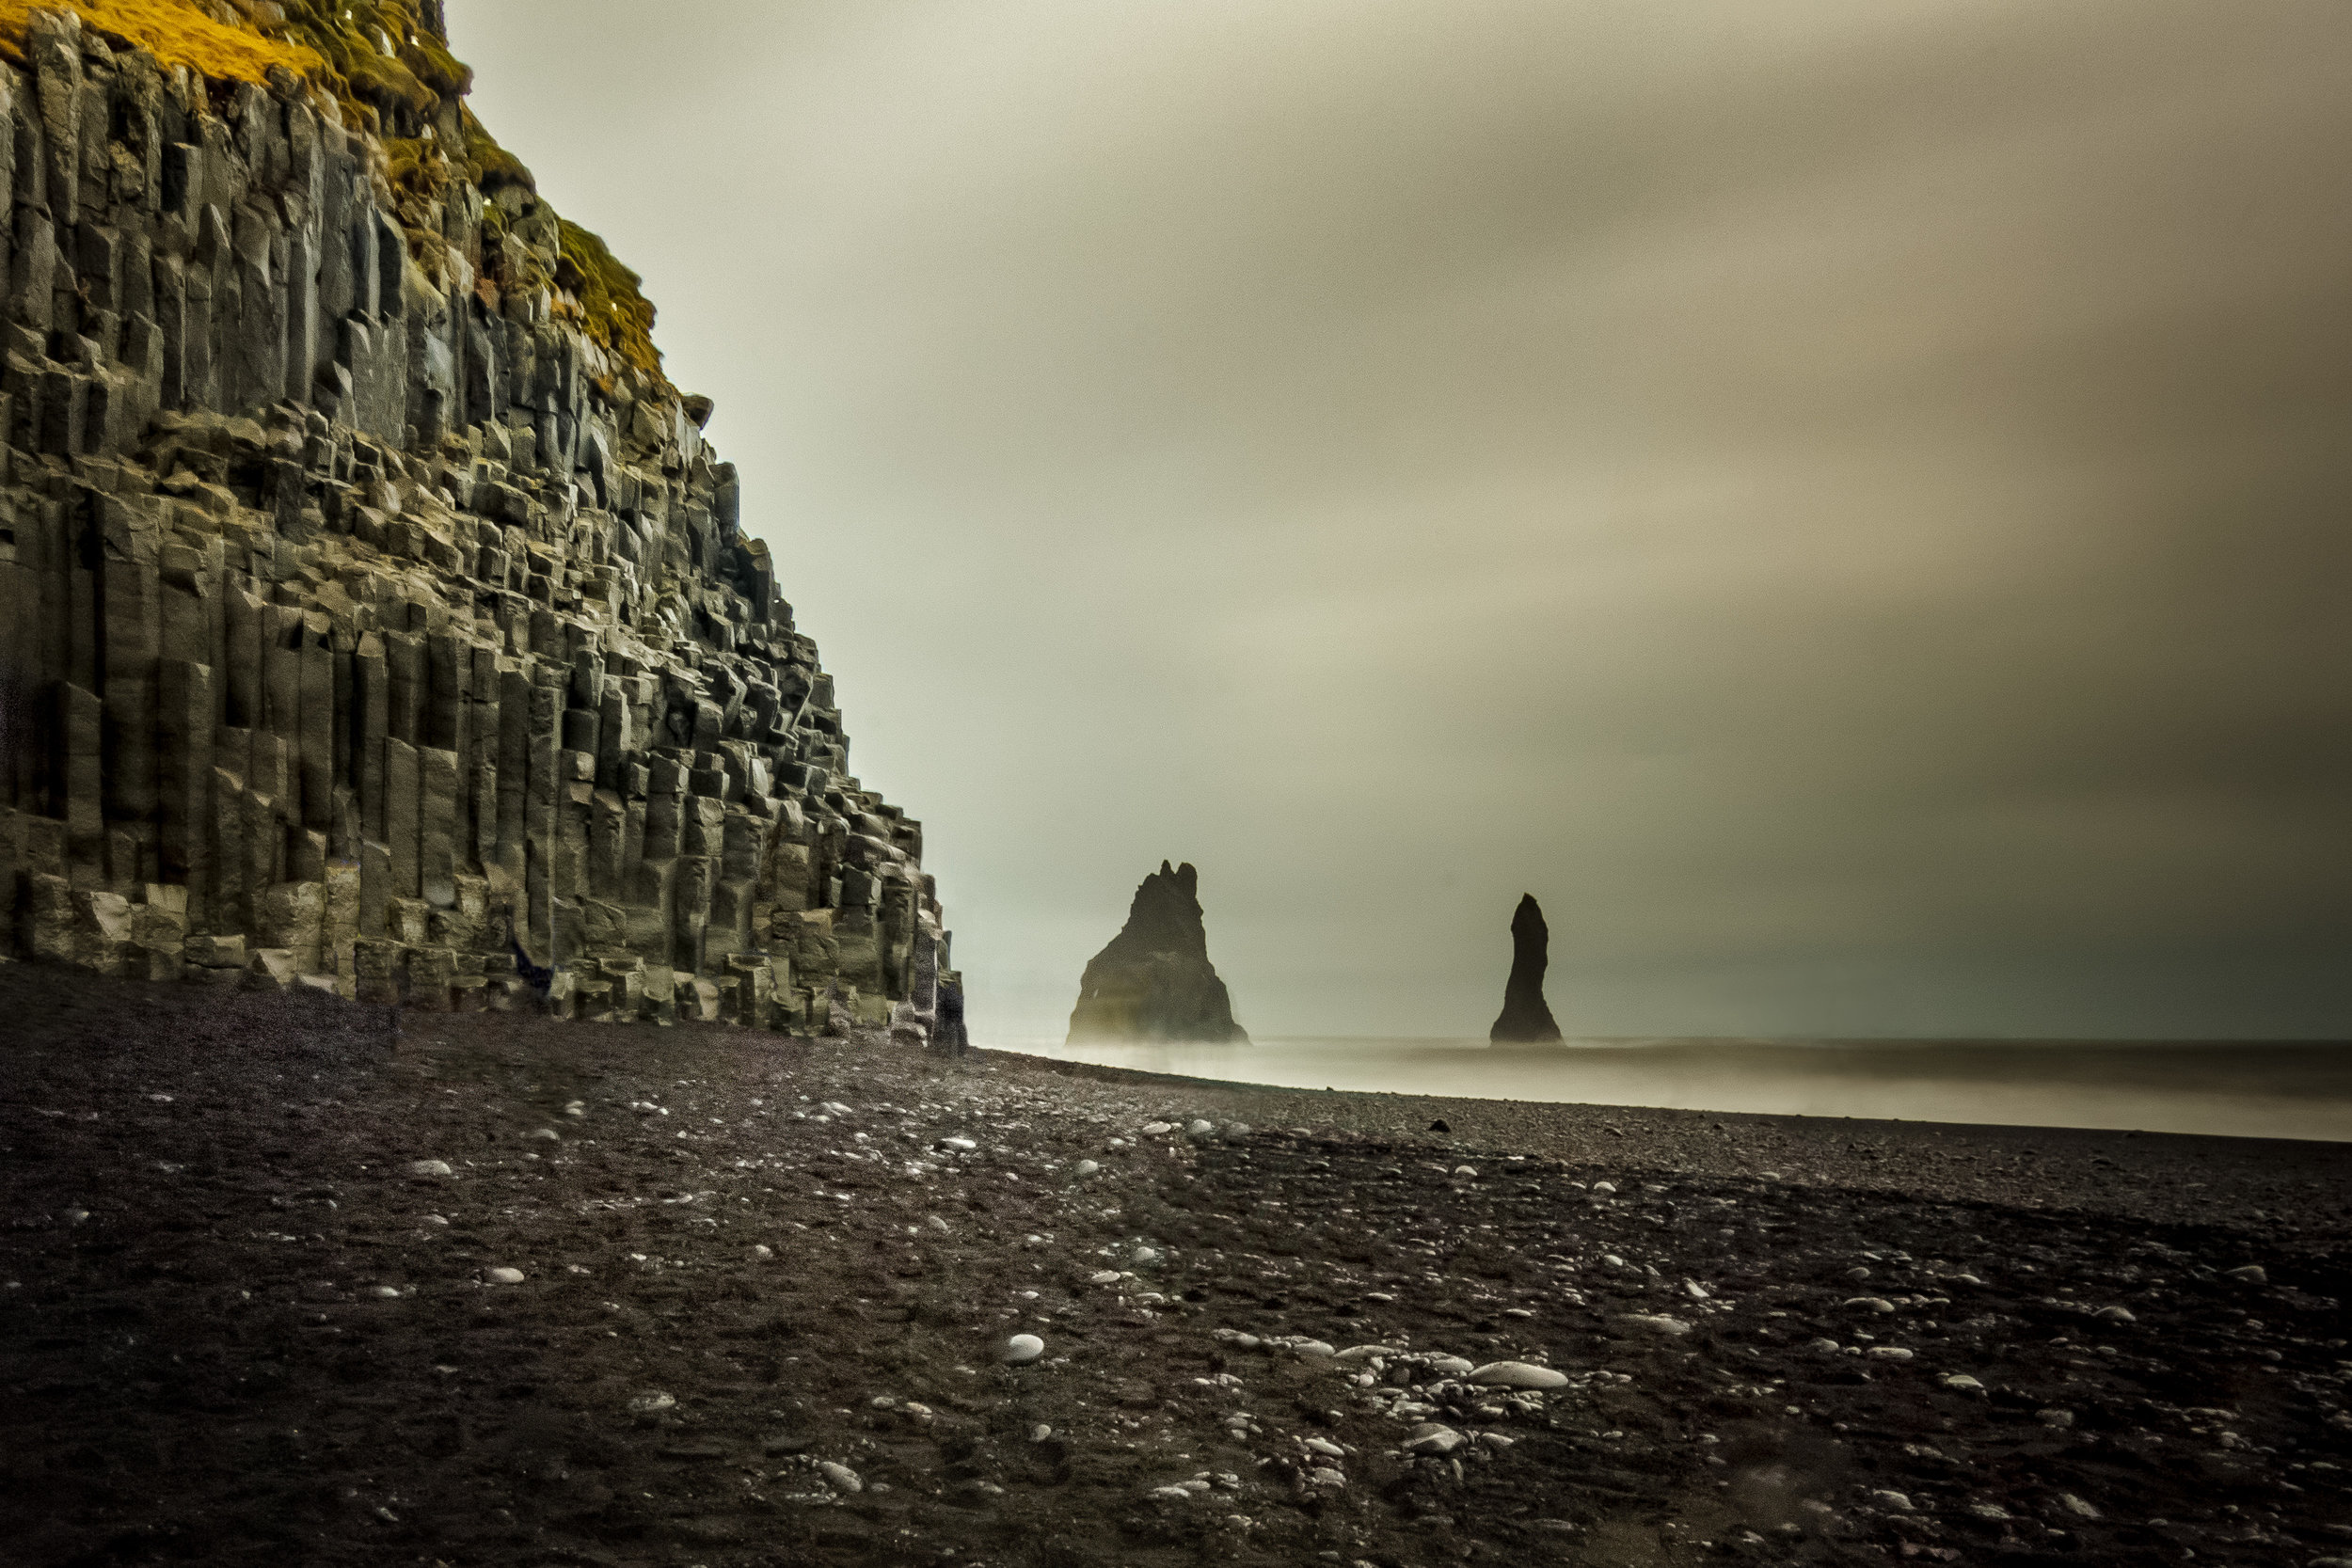
Here is the famous Black Sand Beach in Iceland. It was a gorgeous setting but it was raining and I was being rushed by my tour group. Consequently, the image isn't as sharp, there's no interesting foreground, and you don't get a sense of how grand those basalt columns are. I didn't do this location justice.
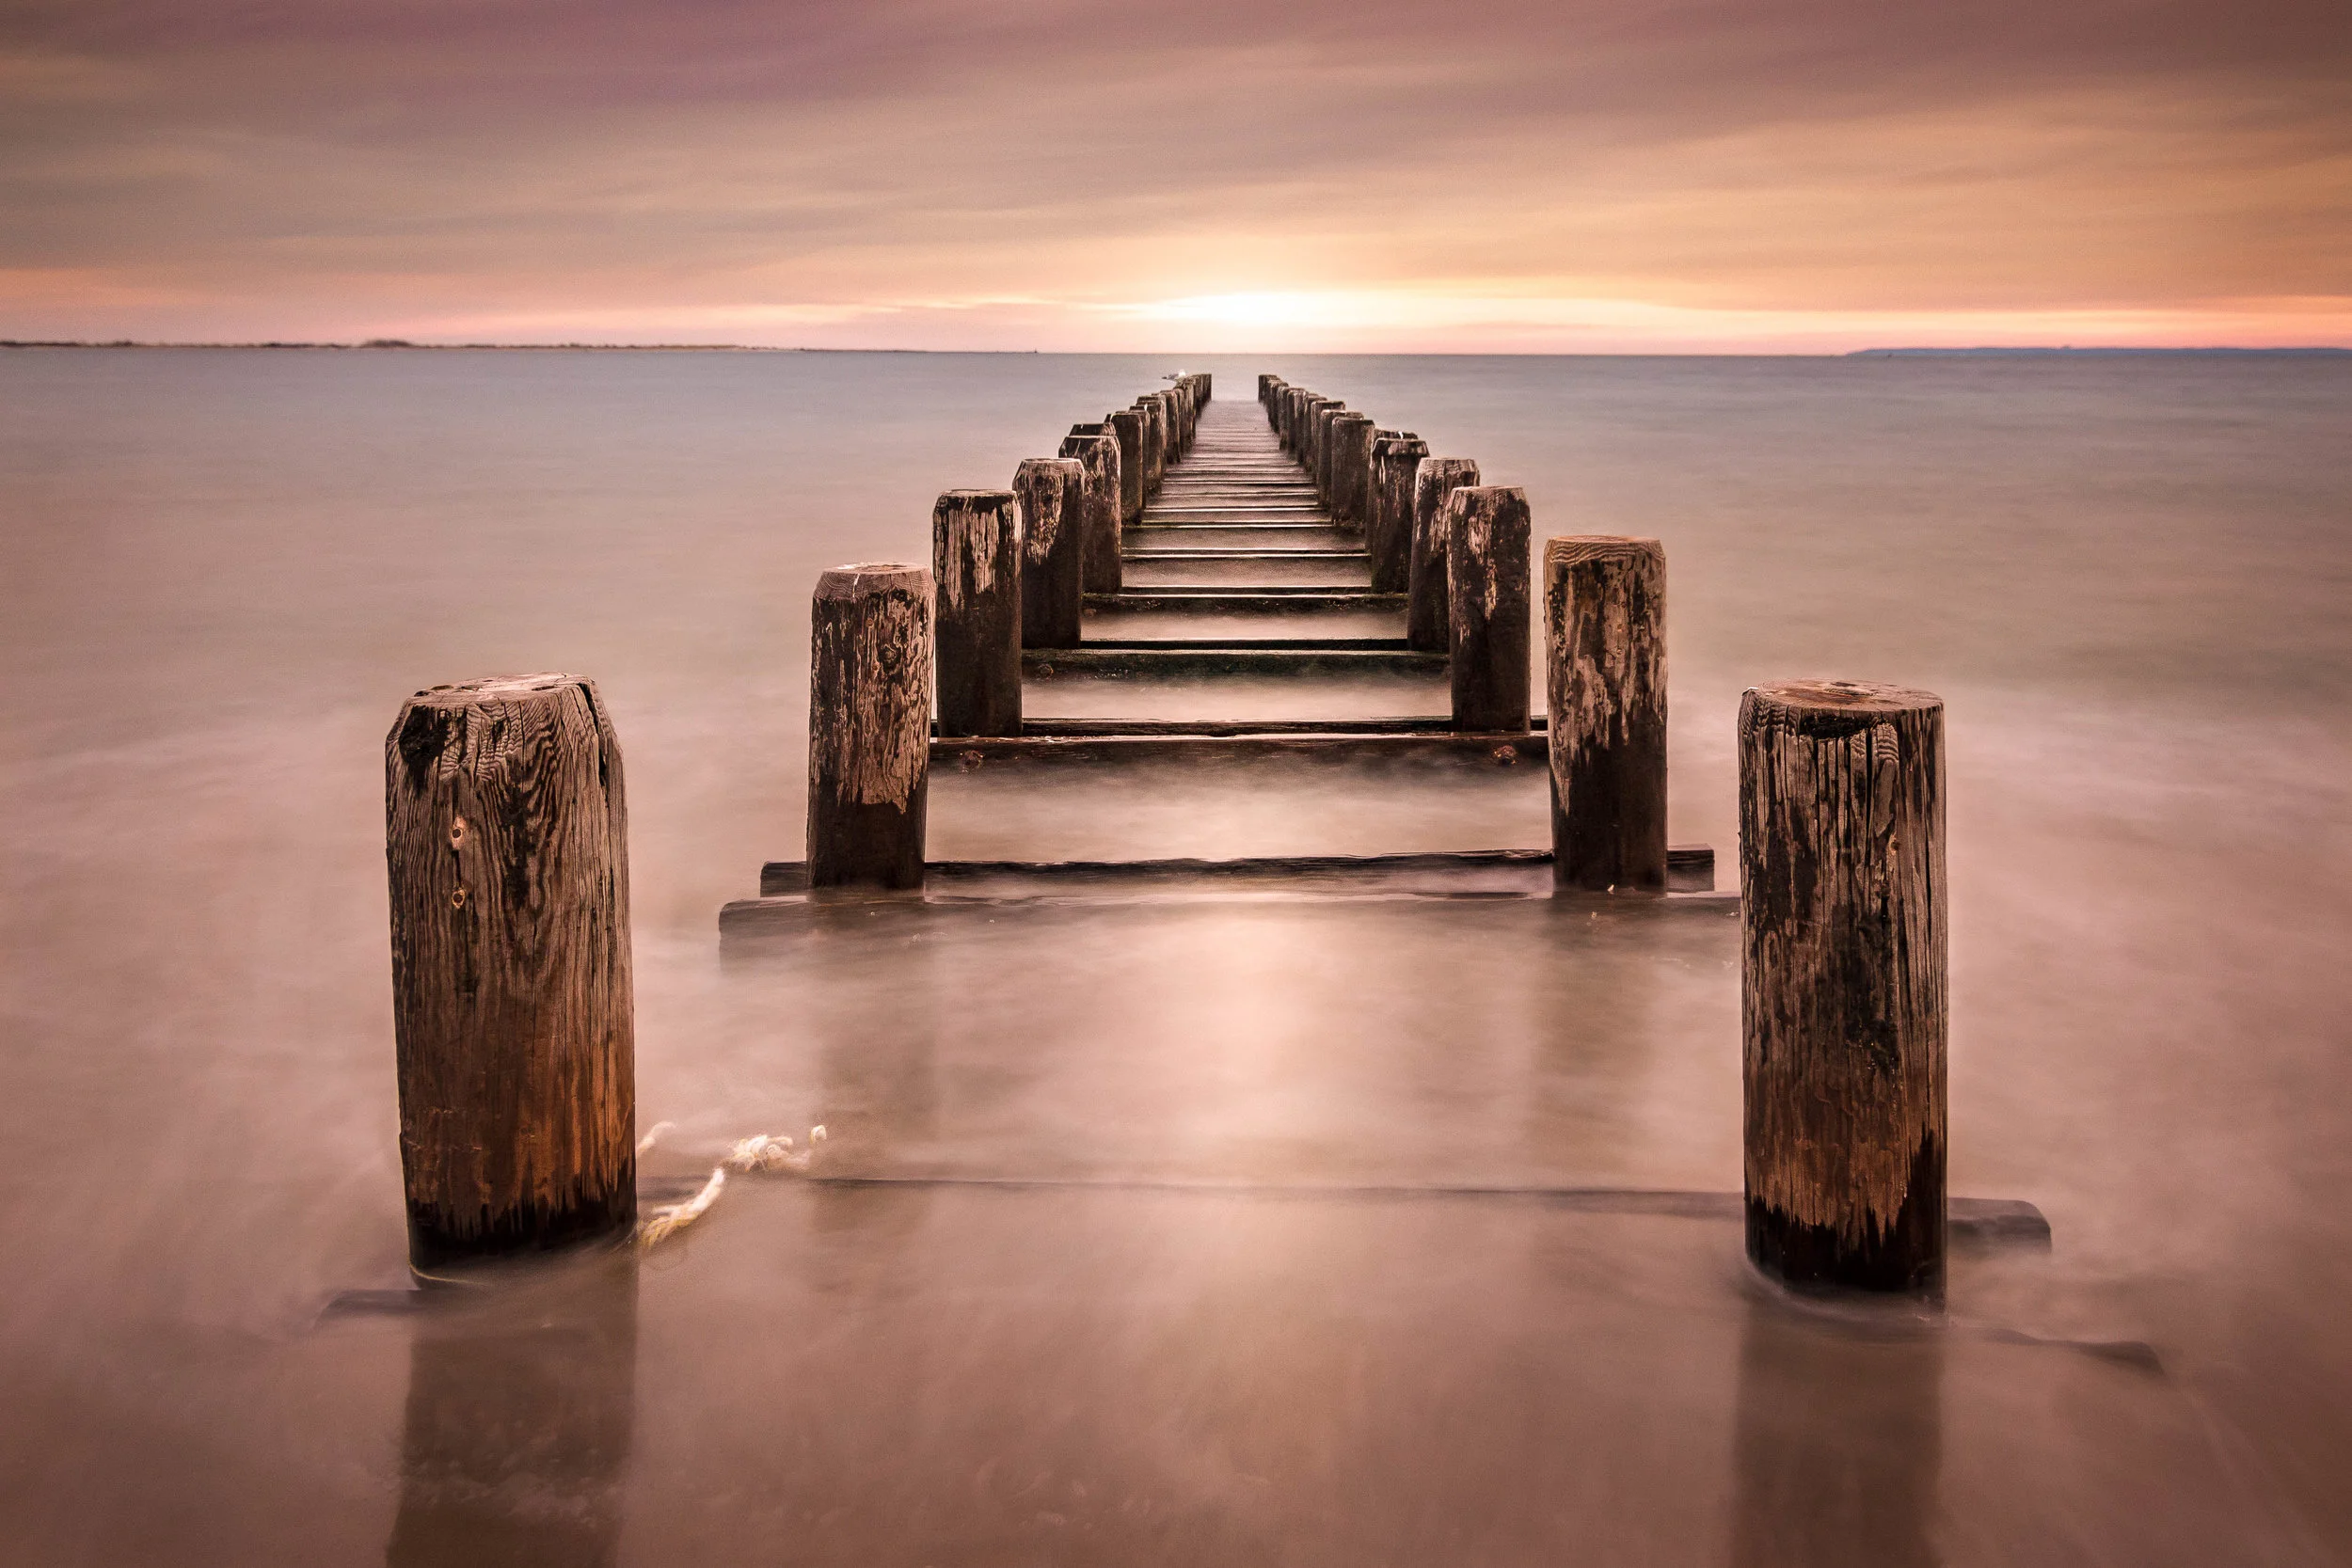
Here's another beach shot: Brighton Beach. Just a shot of an average beach but I was able to spend an entire hour here focused on just a few simple subjects. The photo itself turned out much better than the one in Iceland.
14. Be Purposeful
Probably the most important (and abstract) lesson I learned over this last year is to be purposeful with my photography. I used to shoot, edit and post all of my photos very frivolously. I didn't know what the photos meant because I didn't know what I was trying to convey when I shot them.
I've learned that even as an amateur photographer, you're creating art. And the beauty of being a hobbyist is that you don't have to shoot for anyone but yourself. You should make that photo yours, establish your own style, and bring out your emotions in the photo.
Now when I shoot and post process, I ask myself several questions. What is this photo about? Why do I care about this subject? How does this moment make me feel? What do I want the viewer to pay attention to? Understanding the why in what you're doing, will help you create photos that are uniquely yours. That is the piece of your photo that no one else can replicate.
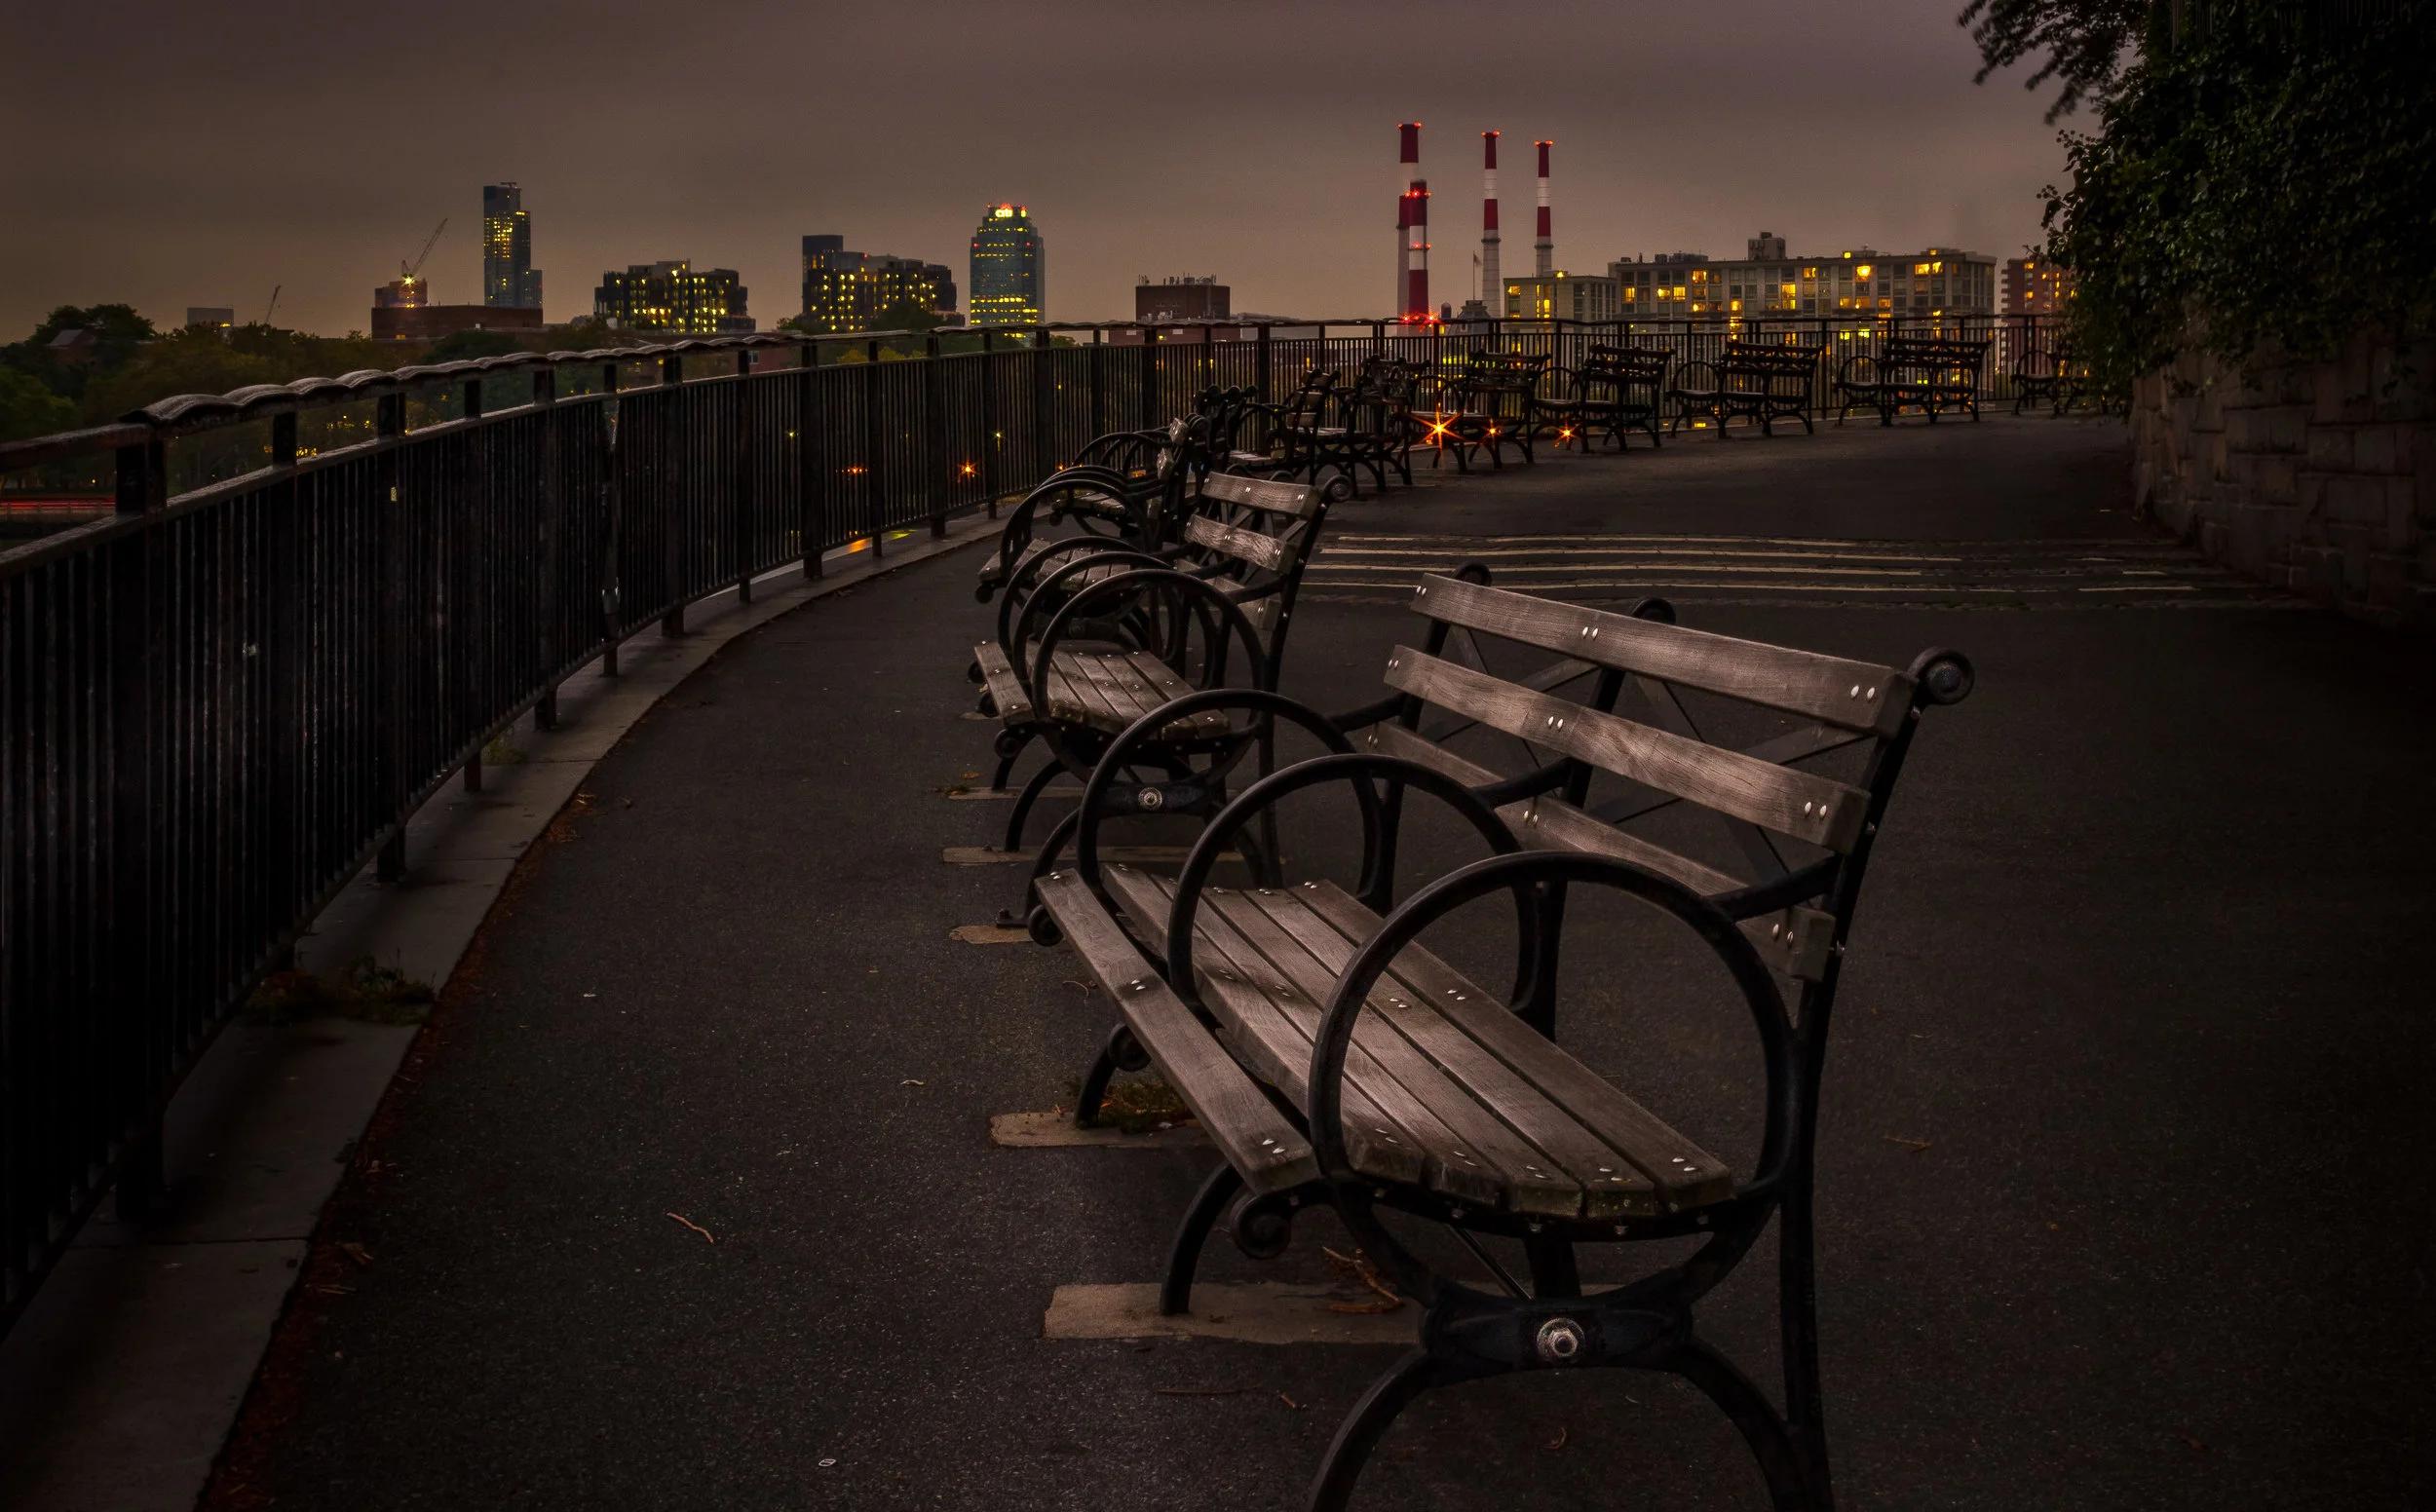
There are no iconic landmarks or majestic landscapes in this shot, but I personally love it. I remember discovering this park in my neighborhood. The weather was gloomy and the sky was getting dark. In a fleeting city like New York, this park had an unusual calmness to it. That feeling was what I wanted to communicate in this photo. (Location: Carl Schurz Park, Upper East Side)